Thursday 29 July 2010
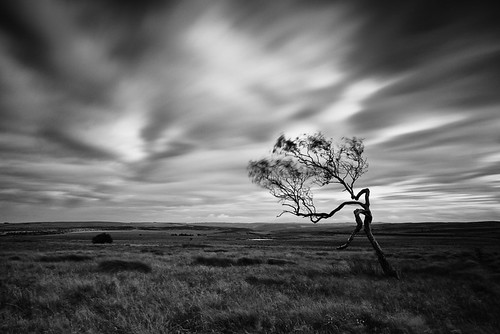
Big Moor Moody Mono-6433
Big Moor Moody Mono-6433, originally uploaded by Rob Ferrol.
A trip out this evening to a relatively local spot on Big Moor at the edge of the Derbyshire Peak District.
This tree is something else, it has so many angles you can compose it from any position. Beware, I have a few more to come.
It was very changeable up there this evening but the light and cloud detail was fantastic. It was windy too so this is the only shot that i manged to get using my Lee 10 stop filter, the rest were blurred.
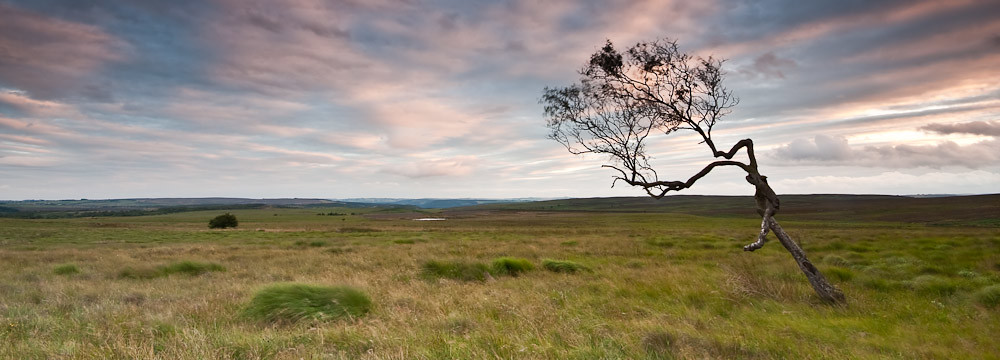
Here is a colour pano of the same location.
Monday 26 July 2010
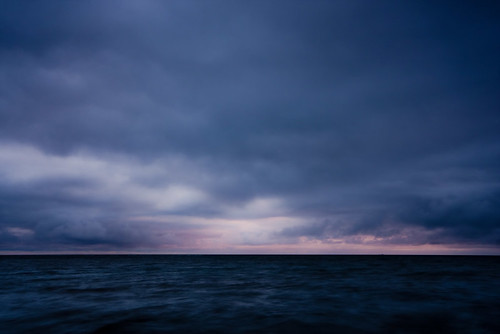
Saltwick Moods-6346
A moody sky greeted us at Saltwick Bay near Whitby. It was an early start from home for a sunrise photoshoot and It looked promising to start with but the cloud built up as we approached our location raising some doubts about any successes today.
The lack of a spectacular sunrise forced me to try different shots and to be more creative which I found hard work at first but really enjoyed in the end and it certainly makes you see things differently.
Watch out for more 'arty' images from Rob Ferrol Photography.
Wednesday 2 June 2010
Tides & Photography
 Spurn Point, Yorkshire
Britain's coastline is steeped in history and natural beauty making it possibly the most photographed coastline in the world. Castles, Coves and Cliffs all make great photographic subjects that can give instantly pleasing results but if you want to perfect your images you need to plan ahead to get the tides right and for your own safety, so this is my little guide to just that.
Generally speaking costal images are best made on a falling tide a) it’s generally a safer option and b) you get nice wet rocks & sand etc for added impact and detail in your images. But certain locations require pinpoint accuracy, some secluded coves, for example, are inaccessible at high water.
Having lived by the coast for a good part of my life, and 15 years of Scuba Diving to my name, I feel quite confident around water but I never get complacent about it. It’s all too easy to go out on a beach at low tide, be captivated by your photography, then find your exit is now awash with water. Only on a recent trip to the Northumberland coast I was stood on some boulders while taking a series of images and you could see the tide moving in fairly quick and had I not been aware I would have soon been in water too deep for my welly boots to contend with. These images were taken just 4 minutes apart and clearly show the rising tide. The image on the right was taken with a 10 Stop filter to blur what little motion in the water there was.
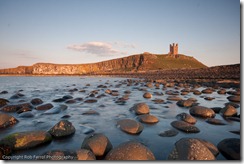
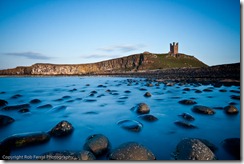
The tides are governed by the gravitational pull of the sun, the moon and the rotation of the earth. The Moon, being closer to us, is the more dominant factor. We have roughly, there are exceptions, two high tides and two low tides in a 24 hour period. Now, I'll attempt to explain tides in simple terms for us photographers.
These gravitational forces cause the water on the surface of the earth to bulge and thus create our high and low tides. When the sun and moon are at 90 deg to each other in relation to the earth these gravitational forces work against each other and this reduces the tidal range (a small bulge) – this is known a Neap Tides. Whereas when the Sun and Moon are in line with the earth they work together increasing the gravitational forces producing a greater tidal range (a large bulge) – known a Spring tides.
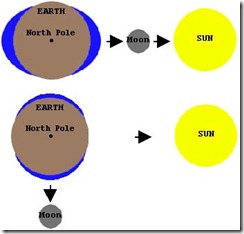 Image courtesy of “Curious About Astronomy”
 You may be asking what is the relevance of all this, well, during spring tides the tides are higher and lower than those of neap tides and thus produce a larger range of water movement. So, if you want to photograph those old decaying Groynes on the beach you may want to avoid high water spring tides because they will probably be under water and conversely a low water spring tide will probably leave them high and dry.
Another variable to maybe consider is the movement of the water itself. Photography has it’s rule of 3rd’s and tidal prediction has it’s rule of 12th’s. At high or low tide there is very little movement of water, this is known as “Slack Water”, but as the water falls (an ebbing tide) or rises (a flood tide) its rate of change speeds up at roughly the mid-point of the tidal change. The following table may help explain this;
| 1st Hour | 1/12th of the total tidal movement |
| 2nd Hour | 2/12th of the total tidal movement |
| 3rd Hour | 3/12th of the total tidal movement |
| 4th Hour | 3/12th of the total tidal movement |
| 5th Hour | 2/12th of the total tidal movement |
| 6th Hour | 1/12th of the total tidal movement |
You may again be asking what is the significance of this. Well, lets say your down on the beach at low water, you’ve been there a couple of hours exposing images, your now at that point of a rising tide where there is the greatest amount of water movement. In places this movement can be rapid enough to out pace your retreat up the beach or in other places, if you are on a higher sand bank for example, cut you off completely from the shore line.
So, how do you avoid these mishaps and plan your shoot to have the optimum tide for your location? You need to consult tide tables. The are produced by a number of sources.
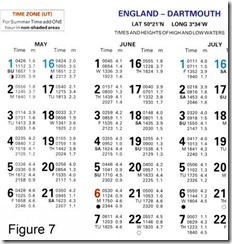 Example Tide Chart
The UK hydrographic office produce tidal information that is published on the Admiralty web site, see below. They are free for a seven day period but you can register and for a small fee and get tide times for any day of the year. Most harbour offices sell locally produced tables and there is a whole host if sources on the web. My favourite though is the National Oceanography Centre website which give free 28 day tidal predictions for most UK ports, have a look at their website here. If your photography is away from a listed port then an element of guesswork and calculated judgement is needed. Using admiralty charts it’s possible to plot the tide for any given point, but, must of us dont have these nautical charts so you need to look at the port tide times either side of your location then you have a range from which to estimate your tide times.
Tidal charts are fairly easy to read and understand. They give the times of high and low water but most times are in GMT so make sure during British Summer Time (BST) that you add 1 hour to the published times unless already corrected for BST, don't get caught out by a simple error. The other figures are the tide heights above chart datum, the lowest depth that the tide should ever reach.
So, there's my guide to tides which I hope will take some of the confusion out of tidal prediction and give you a little confidence when using tide tables to enhance your costal photography. Remember, do you homework and you will have a safe and enjoyable day at the coast.
Here is a few resources that you may find useful;
| National Oceanographic Centre | Free 28 day tidal predictions |
| UK Hydrographic office | Admiralty 7 day tidal prediction service |
| WXTide32 | Freeware windows based tidal prediction software |
| BBC Weather Tide Tables | 7 Day predictions from the BBC |
| Maritime & Coastguard Agency | A website full of useful information about coast safety and related issues. |
Wednesday 12 May 2010
Spurn Point
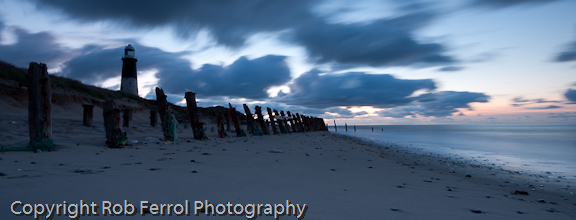
Spurn Point, also known as Spurn Head, is a narrow 3 mile long land spit that stretches into the North Sea from the coast of East Riding, Yorkshire. It forms the north bank mouth of the Humber estuary and in places is as little as 50 yards wide.
It has been owned since 1960 by the Yorkshire Wildlife Trust and is a designated National Nature Reserve, Heritage Coast and is part of the Humber Flats, Marshes and Coast Special Protection Area. Because this is a nature reserve dogs are not allowed.
There is a £3 entry fee if you wish to drive down the single track road along the spit but free if you wish to walk. The car park is situated near the foot of the old disused lighthouse. This lighthouse has not been used since 1986 and is now showing signs of neglect.
From the car park there are various short tracks leading over the dunes to the beach on the east side where you will find rows of old sea defences, or gorynes, which make fantastic foreground interest. There is also pebbled/shingle areas, old bits of driftwood and plenty flotsam and jetsam giving endless photographic possibilities. The dunes themselves can also make a good image taking in the lighthouse too.
The gorynes are visible at high water but photographically i feel this location would best suit a falling tide as the beach can be quite narrow in places. At low water you will have large expanses of beach due to the large tidal movement. Stay safe though and check the tide times before you leave.
On the west side there are large mud flats and photographers can make use of the hides to view migratory wildlife and the large number of waders and wildfowl that gather here.
So, in all, it's well worth a visit and ill definately be back again soon.
[slideshow]
Subscribe to:
Posts (Atom)

