Tuesday 21 June 2011

Getting up early is sometimes worth the effort

When I shoot landscape imges the summer months tend to be the least liked as it often entails a very early rise out of bed to get to a location in time for the start of the 'golden hour' (the hour before sunrise).  With the sunrise on the east coast at about 04:30 the golden hour would be starting at about 03:30 and as I dont live near the coast I had to take into account the traveling time too.

On one particular morning I left the house at 1am (yawn) and headded up to Whitley Bay near Newcastle, with fellow photographer Carl Mickleburgh, to photograph St Mary's Lighthouse.  Throughout the whole journey our eyes were constantly scanning the sky checking for cloud cover etc, mine sometimes checked the inside of my eyelids befre Carl braked harshly to wake me up, lol.  We have had so many early outings scuppered by poor weather we wondered if this was yet to be another wasted journey.  The landscape photographers game is never easy, however much planning and preparation you do, you cannot control mother nature and the weather forcasts seem increasingly unreliable, so, sometimes we have to take these chances.

We arrived on location at about 03:15 to find the light show already on, so much for the 'Golden Hour'!  The light was coming up so fast it was a mad rush to get down on the beach and soon the early rise was forgotten.  The light changed rapidly through the whole light spectrum from cool blues to deep burning reds.  Near perfect cloud cover helped create some dramain the skies and slow down this light transition, enough time for me to quickly choose another composition.

We had just over an hours worth of workable light then it was out with the Lee Filters 'Big Stopper'  to gain a few long exposures then hit the road in search of a BIG breakfast - which incidentally turned out to be a small expensive breakfast.

St Mary's Lighthouse is located just North of Whitley Bay on an island just off shore but connected to the mainland by a small tidal causeway which, incidentally, makes a great leading line for your images.  While it no longer functions as a working lighthouse, being decommissioned in1984, it is easily reached at low tide and is open to visitors where they will find a small museum, visitors centre and a cafe.

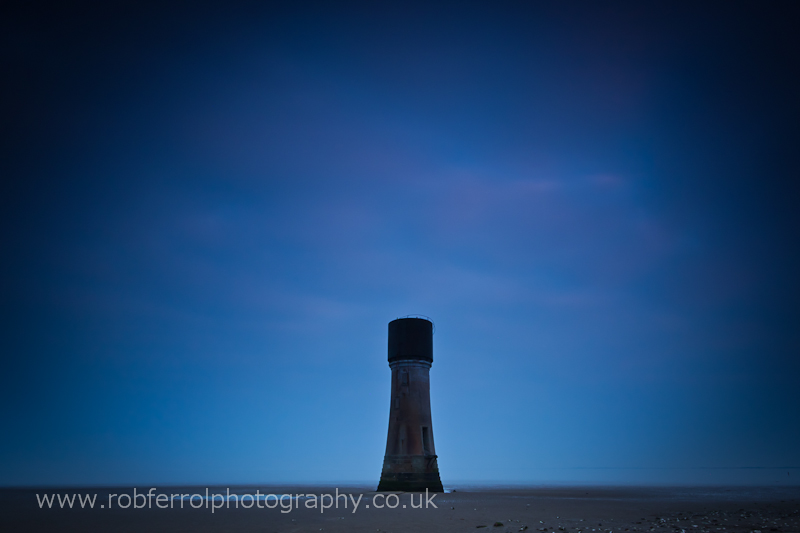
Here are a selection of my favorite images from St Mary's Lighthouse.


Tuesday 26 April 2011

Pre Dawn Delight

One area of photography that I'm beginning to love more and more is the art of low light pre-dawn imagery.   Capturing light colour that is bearly visible to the human eye can create some dream-like images and produce some very interesting and sometimes strange results.  But this genre of photography requires patience and attention to detail in your workflow.

Robin Hoods Bay
ISO100 f/11 194sec
Low light photography requires long exposures often in excess of five minutes so a sturdy well set tripod is a must, set it as low as you can for your composition and bed it in to any soft surface, you could also use a bungee cord attached to your camera bag to give extra stability.  The camera needs to be set on mirror lock up as even the tiny vibrations from the mirror flipping up can last for several seconds creating a soft image and ruining your masterpiece that you waited five minutes for.  A cable release is also essential to avoid any need to touch the camera during the exposure.

Spurn Point
ISO100 f/11 60sec
Metering is a little difficult in low light, most cameras only meter up to a 30 second exposure, beyond that your on your own using the 'Bulb' mode.  You could use a handheld light meter if you have one or another technique is to use the camera ISO to give you a reading.  A technique I learned from read the book 'Nocturn' by a master of low light photography Bruce Percy.   In aperture priority mode set your required aperture then increase the ISO until the meter reading is within 30 secs.  You now need to reduce the ISO back to the original setting i.e 100 ISO taking note of how many f/stops you change it by i.e if your camera said it needed 30 seconds at ISO 800, you have reduced the light sensitivity by 3 stops (800 to 400 to 200 to 100).  So now you need to add 3 stops to the exposure time of 30 secs i.e 30s to 60s to 120s to 240s.  Once you have this base guide take a test shot and use the camera histogram to fine tune your exposure.  Remember to use graduated filters as required to balance the exposure.


Bamburgh Castle
ISO100 f/11 301sec
 Focus and composition is sometimes difficult in low light situations, often it can be hard to see anything through the viewfinder so careful consideration of the scene is needed and sometimes a trial and error approach is needed.  If there is an object in the near foreground you specifically wand sharp you could use a bright torch to illuminate it to allow for manual focusing but I generally find that the infinity setting on the lens yields reliable results and 'live-view' is fairly useless in low light

Spurn Point
ISO100 f/11 244sec
Getting out there and shooting well before dawn and testing a few different techniques can often give some very pleasing results just remember the flask and warm coat while waiting for those seconds to tick by.

Runswick Bay 1hour before sunrise
ISO100 f/11 275sec

Monday 4 April 2011

Spurn Point Location Guide

Pre Dawn at Spurn Point
(c) Rob Ferrol

Spurn Point is a unique narrow spit of land jutting out into the North Sea creating a natural breakwater forming the Northern edge of the Humber estuary.  An aerial view shows just how unique this land mass is, it stretches for just over three miles but is as narrow as 46 meters in places.

The Spurn is reached by heading east from Hull along the A1033 towards Withernsea.  At Partington take the B1445 towards Easington village.  Vehicles are allowed to drive down the Spurn Point road but there is a £3 charge during daylight hours.

The site is currently owned by the Yorkshire Wildlife Trust and is designated a Natural Nature Reserve, Heritage Coast owing to its rich and diverse eco system. The area attracts many wading birds to its mud flats and is a stop off point for many migratory birds too.  On my last visit I was even privileged to see two deer running past – I didn’t even know there were any on Spurn!

The Spurn is made up of sand and shingle and is formed from material washed down the coast and settling in the sheltered waters of the Humber estuary.  This cycle is continually happening and it is estimated that the spun is moving westwards at a rate of 2 meters per year.  On the seaward side of the Spurn there are many rows of groynes in various stated of decay that was placed there in Victorian times in the hope of reducing the erosion.  This in theory worked well but the land north of the Spurn was unprotected and has eroded some 100+ meters since the defences were put in place leaving the Spurn more exposed.

Photographically the Spurn Point is a wonderful place offering easy access, close car parking and at the risk of annoying some, you can even get some shots from the car park, lol.  The dunes can be a little steep in places but nothing too taxing.  It has two old lighthouses, one on the Spurn and the other on the landward side just off the shoreline.  The dunes and old groynes make great foreground interest and an endless supply of compositional opportunities, the groynes can make some quite attractive abstract images too.  For me, the best time to visit is at sunrise with a falling tide, the shallow sloping sand shelf can help create some interesting patterns with the water and the receding high tide will have erased most footprints from the previous day’s visitors.  It is worth pointing out that the Humber estuary is a busy shipping lane, some large ship pass quite close to shore, and there is often quite a lot of flotsam/jetsam on the shoreline.  I have never as yet visited at sunset but I can see it has great potential for this time of day also, especially on the landward side.

I have found accurate weather forecasts for the Spurn difficult to find.  Most forecasts are for the major towns nearby but on the exposed Spurn things can be very different. And change at a moments notice, so plan for this in advance.

For tidal information I use the following link for tide times at the port of Immingham.  http://www.pol.ac.uk/ntslf/tides/?port=0026  Its worth noting that at high tide in stormy conditions the sea can breach the Spurn in places so do take care and plan ahead.

Whatever your ability Spurn has something to offer and you’ll not be disappointed.  Finally a fellow photographer, Doug Chinnery, is holding a photography workshop at this very location, so why not pay this place a visit and get some expert tuition at the same time. 


Crashing waves at Spurn Point
(c) Rob Ferrol

The old 'Light Tower' Spurn Point
(c) Rob Ferrol


Abstract composition using the old groynes, Spurn Point
(c) Rob Ferrol

Sunrise at Spurn Point
(c) Rob Ferrol
 
Unforecast Mist at Spurn Point
(c) Rob Ferrol


Saturday 8 January 2011

My guide to Saltwick Bay

[caption id="attachment_368" align="aligncenter" width="300" caption="The three Icons of Saltwick Bay"][/caption]

Saltwick bay is a little gem of a location on the North Yorkshire coast, situated just south of the fishing port of Whitby.  It offers an abundance of photographic opportunities that are all compacted into a relatively small area.

The bay consists of a small sandy beach surrounded by high cliffs and flanked on either side by flat shale shelves. These shelves hold two local icons, 'Saltwick Nab' and the probably more well known, 'Black Nab'.

[caption id="attachment_365" align="aligncenter" width="300" caption="Black Nab viewed from the beach"][/caption]

The 'Black Nab' is situated on the southern shelf.  It has a distinctive shape similar to that of a submarine coning tower and close to the base of this can be found the remains of the 'Admiral Von Tromp', a Scarborough based fishing trawler that ran aground in 1976 with the sad loss of two lives.  There is an abundance of rocks in this area that offer interesting abstract compositions and you may also find ammonite fossils which this area is also famous for.

[caption id="attachment_366" align="aligncenter" width="300" caption="The 'Whale shaped' Saltwick Nab"][/caption]

On the northern shelf you will find 'Saltwick Nab', a somewhat 'breeching whale' shaped rock prominence again surrounded by a shale shelf offering similar textured rocks, some of which have very bizarre patterns and deep grooves that seem almost unreal.

[caption id="attachment_364" align="aligncenter" width="300" caption="One of many abstract composition opportunities"][/caption]

The Bay has another trump card up its sleeve though.  The fact that it is North East facing makes it a very unique location because in the height of summer you can capture the sun rising and setting over the sea, quite novel considering you are on the east coast.

So, you could literaly spend all day here from dawn to dusk, tide permitting.  Talking of which the location really need to be photographed with a falling tide, there is little beach available at high tide, and to get close to the 'Back Nab' and wreck site you need the tide to be almost at low water.  Do not photograph the shelves or nabs on a rising tide, there is a real danger of being cut off by the tide.  I use the tide tables here http://www.pol.ac.uk/ntslf/tides/?port=0174 but always consult your usual reliable tidal references.

Now, how to get there.  The bay is located from Hawksker Lane which is the road that takes you to Whitby Abbey.  From there turn left up the lane to Whitby Holiday Park and then park in the layby by the park entrance.  To get down to the bay walk along the cliff top towards the holiday park and you will come across the path that leads down to the bay.  This path can be quite muddy and slippery in places especially after wet weather so take care and wear good suitable footware.


- Posted using BlogPress from my iPad